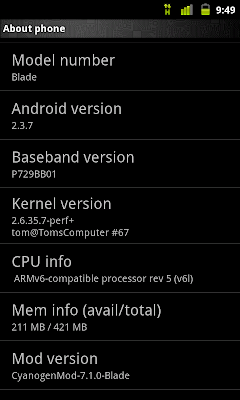
I wasn't really ready earlier to tweak my new Phone. But Finally I gave it up, and I reached out to my Friend who helped me to void the warranty of my Dell XCD 35 Phone, Thanks HD :-)
HD is a guy who loves Android, Apple and everything else than Microsoft! :-D
So Just to tell you guys earlier I had Froyo(Android 2.2) on my Phone, and now it's upgraded to Gingerbread (Android 2.3). The process of upgrading to Gingerbread was actually very simple than what I thought! I read couple of forums and found out that during this Mod of applying custom ROM the phone might get screwed and chances of this in my case were very high, thanks to my Over Excitement!But it went smooth and I was happy, yaayyyy!

The Process was upgrading was Quite simple.
1. The most important Process which voids warranty of your Phone, called 'Rooting'. By rooting your Phone, you get Super User (su) permission on your Phone. You need this app called ' z4root ' and it gives you option of Permanent/Temporary Rooting.
Source: http://android.modaco.com/topic/337262-permanent-root-for-22-blades/
2. I took the backup of my current ROM, which was Froyo 2.2 with the help of an app from Android Market called 'ROM Manager', you get this app called ''ClockWorkRecovery Mod' inside ROM Manager itself.
3. Then you need to download the Custom ROM, I got it from http://forum.cyanogenmod.com/topic/32495-cyanogenmod-7-for-the-zte-blade-v710-9-oct-2011/
4. Copy both the Stock ROM & Custom ROM on to your Laptop, copy all the stuff from SD Card to your Laptop.
5.Now the Real work starts! Upgrading to GingerBread. Simple procedure if followed calmly ;-) Don't get panic unless your phone explodes :-D
6.Goto ROM Manager, select Reboot into Recover option. Your phone will now boot into Recovery mode. Cute Unix like UI will appear, where you'll need to use Volume Hi/Low and Home Button on your phone to browse through the menu and select a particular option respectively!
7.First thing Wipe data/factory reset and Wipe cache partition.
8. Then goto Advanced >> Wipe Delvik Cache & Battery Status.
9. Finally go and select install zip from SDCARD, browse to the Custom ROM zip file. That's it, rest of the procedure will be take care by your Phone :)
10. I had to wait just for 5 minutes and whoaaaa it was Done.
11. I had removed battery inserted again, and booted the Phone. That's it! I'm ready to flaunt my upgraded phone \m/
12. In custom ROM, you don't get Google apps/market installed default. So you need to download it from http://forum.cyanogenmod.com/topic/32495-cyanogenmod-7-for-the-zte-blade-v710-9-oct-2011/
13. Install it the way we did for Custom ROM. Just don't wipe anything this time. And you should get the Google Apps installed after the boot :-)
Please Note: As I've mentioned it from starting of this Post this Process voids your Phone warranty, and the steps which I have mentioned doesn't come from a Geek but a newbie who just entered into the world of AnDroid!